
Onboarding remote translators is a structured process covering legal agreements, tool access, style guide delivery, and ongoing communication to ensure consistent, high-quality multilingual output. Get it wrong and you will spend more time fixing errors than shipping content. Get it right and your translators hit the ground running from day one. This guide gives project managers and business leaders the exact steps, tools, and best practices to build a remote translation team that actually works. Think of it as your no-nonsense playbook for remote translator integration.
What do you need before onboarding remote translators?
Preparation is everything. Skipping this stage is the single biggest mistake project managers make, and it costs them dearly in revisions later.
Before a translator sees a single file, you need the following in place:
- NDA and contract signed. NDAs and encrypted file exchange are mandatory before any document exchange to comply with GDPR. Unencrypted email is not an option.
- Payment terms agreed. Set rates, currency, invoicing schedule, and preferred payment method upfront. Ambiguity here causes friction fast.
- CAT and TMS access granted. Tools such as memoQ, SDL Trados, or Phrase need to be configured and tested before the translator’s first assignment.
- Style guide and glossary delivered. Effective style guides limit content to 10 key rules on the first page, formatted around questions, with a direct link to the current version in every project brief.
- Secure file transfer set up. Use SFTP or a secure portal. Standard email attachments breach data protection regulations.
- Centralised knowledge base ready. Tools like Notion or Confluence work well for storing SOPs, credentials, and onboarding documents in one accessible place.
| Prerequisite | Recommended tool or method | Why it matters |
|---|---|---|
| Legal agreement | NDA + service contract | GDPR compliance and IP protection |
| File security | SFTP or secure portal | Prevents data breaches |
| Translation tools | memoQ, SDL Trados, Phrase | Consistency and TM leverage |
| Style guide | Notion, Google Docs (linked) | Reduces revision cycles |
| Knowledge base | Notion, Confluence | Single source of truth |
Pro Tip: Send the style guide link in every project brief, not just during onboarding. Translators reference it more often when it is one click away.
How to execute the step-by-step onboarding process
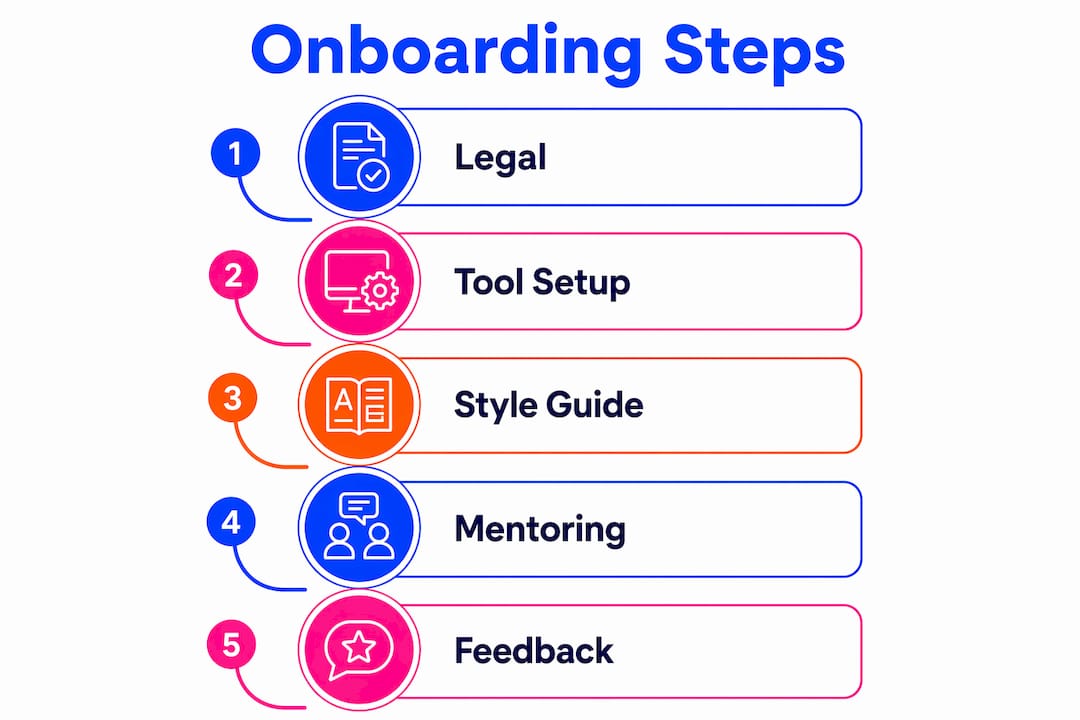
A 10-step onboarding checklist covers everything from NDA to welcome kit and ensures no sensitive data is shared before the relationship is properly established. Here is how to run it in practice:
- Send and collect the NDA. No exceptions. This protects both parties.
- Issue the service contract. Include language pairs, subject matter, rates, and revision policy.
- Agree on payment terms. Confirm currency, invoicing frequency, and payment method.
- Set up payment in your system. Add the translator to your accounts payable or freelancer management platform.
- Deliver the style guide and glossary. Share the link, not a PDF attachment. PDFs go stale.
- Grant CAT and TMS access. Walk them through login, project structure, and any custom settings.
- Assign a paid test project. A short, real assignment is far more revealing than a generic test. Pay for it.
- Provide detailed feedback. Be specific and constructive. This sets the tone for the entire working relationship.
- Add to your vendor database. Tag by language pair, subject expertise, availability, and rate.
- Send a welcome kit. Include key contacts, escalation paths, communication channels, and a brief on your company culture.
Assigning a buddy or mentor for the first two to three projects is one of the most effective steps you can add to this list. Buddy systems bridge cultural and time zone gaps far better than documentation alone. The buddy answers quick questions, flags common pitfalls, and helps the new translator feel part of the team rather than a lone contractor.
Pro Tip: Schedule a 15-minute synchronous walkthrough of the style guide. Explaining the reasoning behind each rule increases adherence far more than simply sending the document.

How to provide context and keep quality high remotely
Context is the most underrated part of remote translator training. A translator working without environmental context will make assumptions, and assumptions create errors.
- Embed screenshots directly in your TMS. Visual context in translation tools prevents linguistic misinterpretation caused by missing UI or product environment information.
- Clarify machine translation expectations. State clearly whether MT post-editing is permitted, and to what standard. Ambiguity here leads to inconsistent output.
- Centralise all queries. Use TMS comment threads or a dedicated Slack channel. Scattered email threads lose critical decisions and create version confusion.
- Build a feedback loop. After each project, share specific, encouraging feedback. Focus on patterns, not one-off errors.
- Document escalation paths. Every translator should know exactly who to contact when they hit a problem they cannot resolve alone.
- Make onboarding materials asynchronous. Not every translator works in your time zone. Self-paced resources respect their schedule and improve completion rates.
“Translators with integrated screenshots and environment visuals perform at a measurably higher quality. Context is not a nice-to-have. It is a quality control mechanism.”
A centralised TMS or wiki for SOPs, credentials, and feedback prevents knowledge loss and means any team member can pick up a workflow without confusion. This is especially critical when managing large, multilingual projects across multiple time zones.
What are common onboarding challenges and how do you fix them?
Even well-prepared onboarding hits snags. Here are the most common problems and how to address them:
- Over-reliance on email. Email buries critical information. Move SOPs, credentials, and onboarding documents to a central repository such as Notion or Confluence immediately.
- Style guide ignored. Sending a document is not the same as explaining it. A 15-minute walkthrough focused on the reasoning behind each rule increases compliance significantly.
- Time zone and cultural friction. Buddy systems and clear async communication protocols resolve most of this. Pair new translators with someone who has navigated the same challenges.
- Feedback fatigue. Overwhelming a new translator with corrections on their first project damages confidence and quality. Focus on the top three patterns, frame feedback constructively, and acknowledge what they did well.
- Outdated documentation. A style guide that does not reflect current brand voice is worse than no guide at all. Assign someone to own and update onboarding materials quarterly.
Pro Tip: Monitor the first two or three project outputs closely. Catching quality issues early costs a fraction of what a full revision cycle costs later.
Glocco’s honest take on what actually works
At Glocco, we have been building and refining remote translation teams since 2014. Here is what we have learned the hard way.
Documentation matters, but it is not enough on its own. The translators who integrate fastest are the ones who had a real conversation with someone on the team in their first week. A 15-minute call beats a 30-page onboarding PDF every time. The buddy system is not a soft, optional extra. It is the single most effective tool for reducing early-stage errors and building loyalty with your freelance pool.
We have also learned that investing time upfront in clear style guides and structured feedback saves a disproportionate amount of time in revisions. The maths is simple: one hour of structured onboarding prevents three to five hours of rework. Keep your onboarding materials live, linked, and updated. A static PDF is a liability. A dynamic, linked knowledge base is an asset that compounds over time.
— glocco®
How Glocco supports your remote translation setup
Glocco has worked with project managers across e-commerce, fintech, legal, and medical sectors to build translation workflows that hold up under pressure. If you are setting up or scaling a remote translation team, the right tools make a measurable difference. Glocco’s resources on AI tools for translators cover the CAT and TMS integrations that speed up onboarding and reduce inconsistency across large projects. For teams working across regulated industries, Glocco also provides guidance on managing translation projects from test assignment through to final delivery. Whether you are onboarding your first remote translator or your fiftieth, Glocco has the expertise and tools to support you at every stage.
FAQ
What is the first step to onboard a remote translator?
The first step is signing an NDA and service contract before sharing any project files or sensitive data. This protects both parties and ensures GDPR compliance from the outset.
How long does remote translator training typically take?
Professional translator certification programmes require 45–60 hours over 7–8 weeks, though internal onboarding for a specific project or agency can be completed in a few days with a structured checklist and clear documentation.
Why is a buddy system effective for remote translator integration?
Pairing a new translator with an experienced colleague for the first two to three projects resolves time zone and cultural barriers more effectively than documentation alone. It accelerates integration and reduces early-stage errors.
What tools are best for onboarding remote translators?
CAT tools such as memoQ, SDL Trados, or Phrase handle translation memory and consistency. Notion or Confluence work well for centralised SOPs and onboarding materials. Slack or TMS comment threads keep queries organised and out of email.
How do you maintain translation quality after onboarding?
Embed visual context such as screenshots directly in your TMS, run structured feedback sessions after each project, and keep your style guide updated and linked in every project brief. Quality degrades when context and feedback are absent.


